


מה שנעשה זה
- להטמיע קוד בשופיפיי
- להפעיל את גוגל טאג מנגר
- לסדר את אנליטיק GA4
איך מיצרים גוגל טאג מנגר
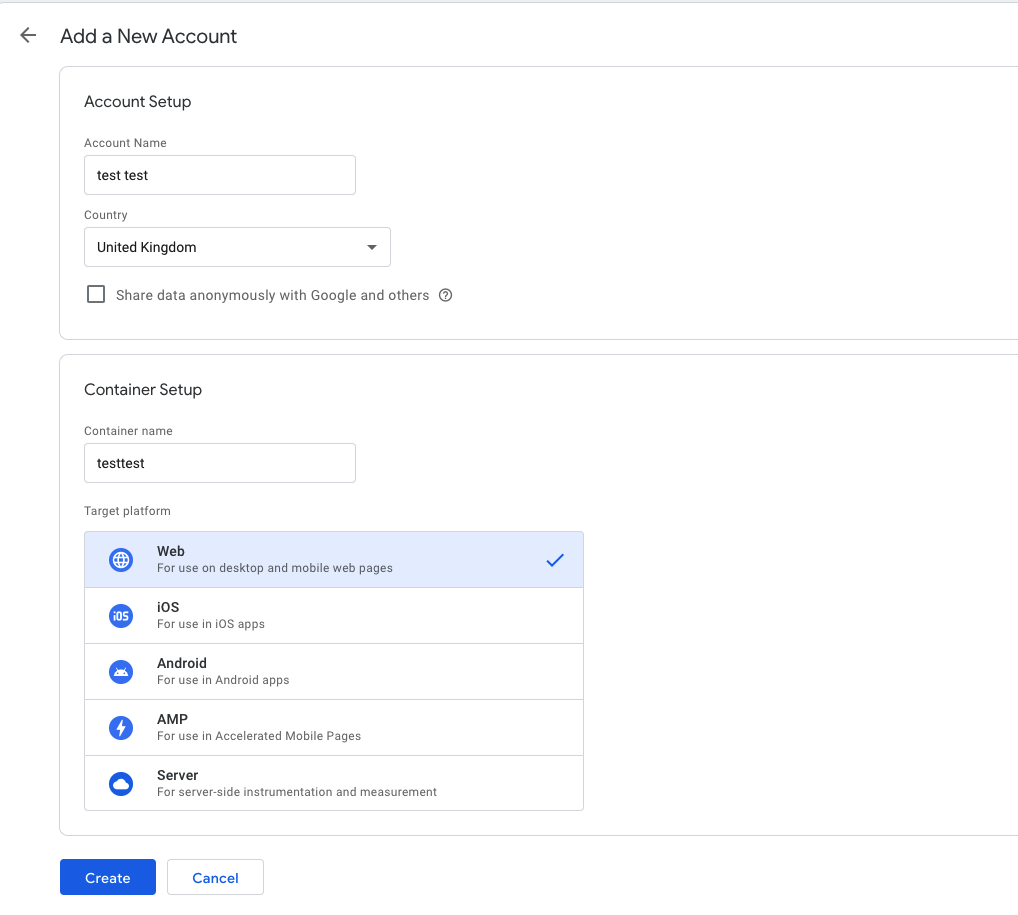
הכנס לכאן tagmanager.google.com ותייצר חשבון תואם לאתר שלך (לשים לב מתוך חשבון גימייל אדמיניסטרטיבי לא זה שיש לך מיילים פרטיים או בעלי חשיבות עיסקית)

תן לחשבון שם ולבחור WEB
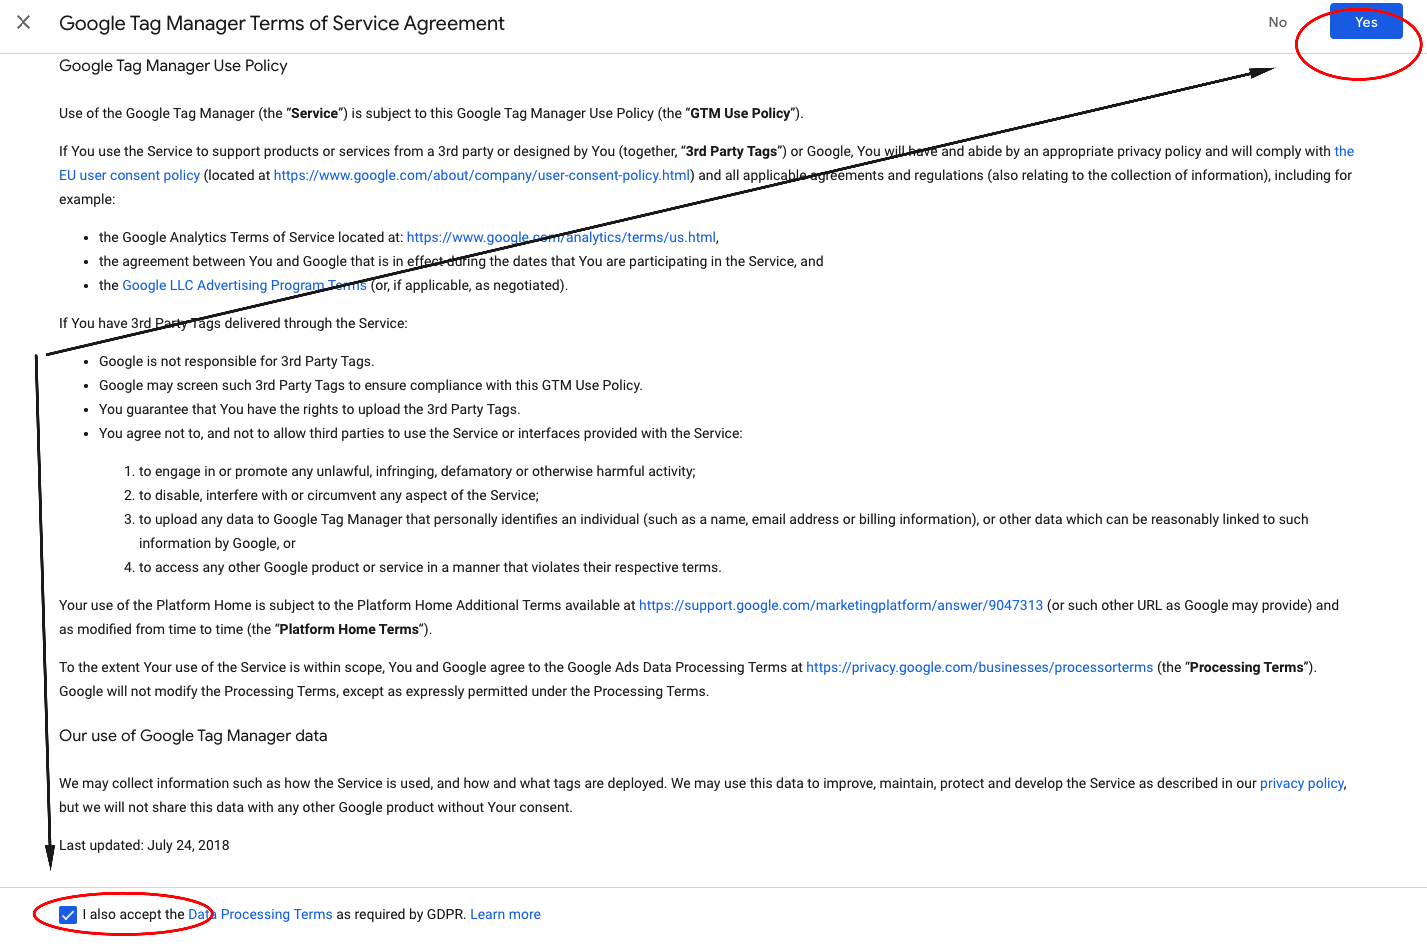
תאשר את הצק בוקס ותלחץ YES
החשבון מוכן
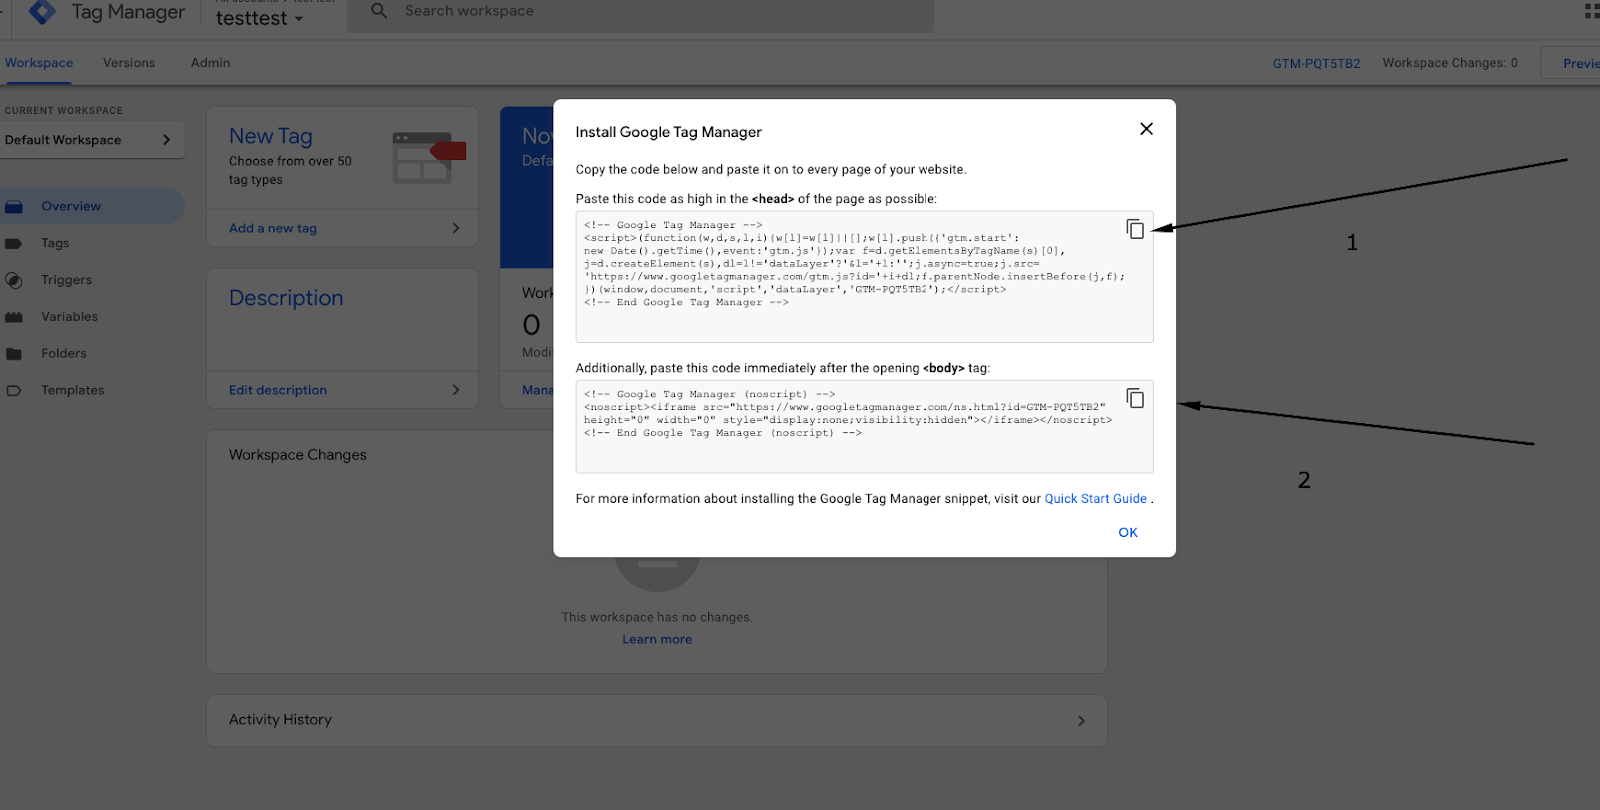
תקבל את המסך הבא של טאג מנג׳ר שבו אתם מקבלים את הקוד להטמעת הטאגים מספר 1 ומספר 2 חשובים שיהיו במקומות הנכונים ובשביל שזה יקרה צריך לפתוח את שופיפיי
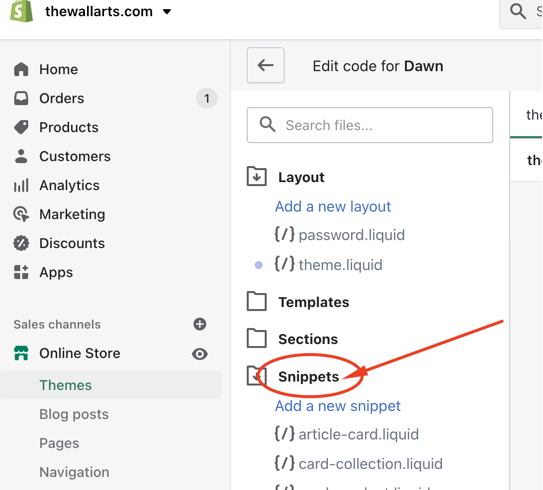
נכנסתם לשופיפיי צריך ללכת לחלק של הקוד ולעדכן שם את המערכת
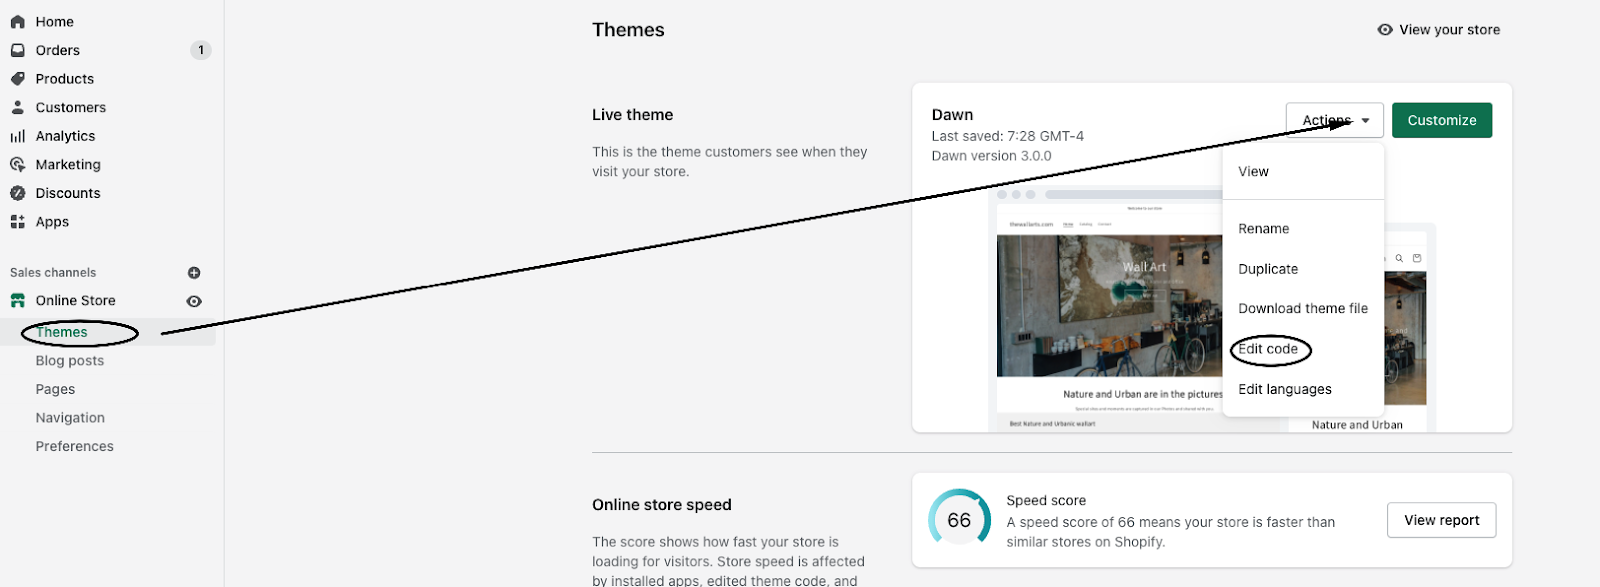
אז בשופיפיי נכנסים ל online store → themes
לוחצים על החץ מימין ל Actions ובוחרים את Edit Code
החלק הזה צריך להעשות בתשומת לב תדאגו לגיבוי כדי שלא יהיה בלאגן
תעמדו על theme liquid ותמצאו את החלק הראשון של ה head לפני התחלת הפונקציות ותכניסו לשם את הקוד מחלק 1 בתמונה

בשורה השלישית מתחיל ה head שם תכניסו את הקוד של חלק 1 מהטאג
את החלק השני תכניסו באותו עמוד רק תחת שורה שנקראת <body> בכל תבנית תקבלו אותה במיקום אחר
אני משתמש פה בתבנית dawn
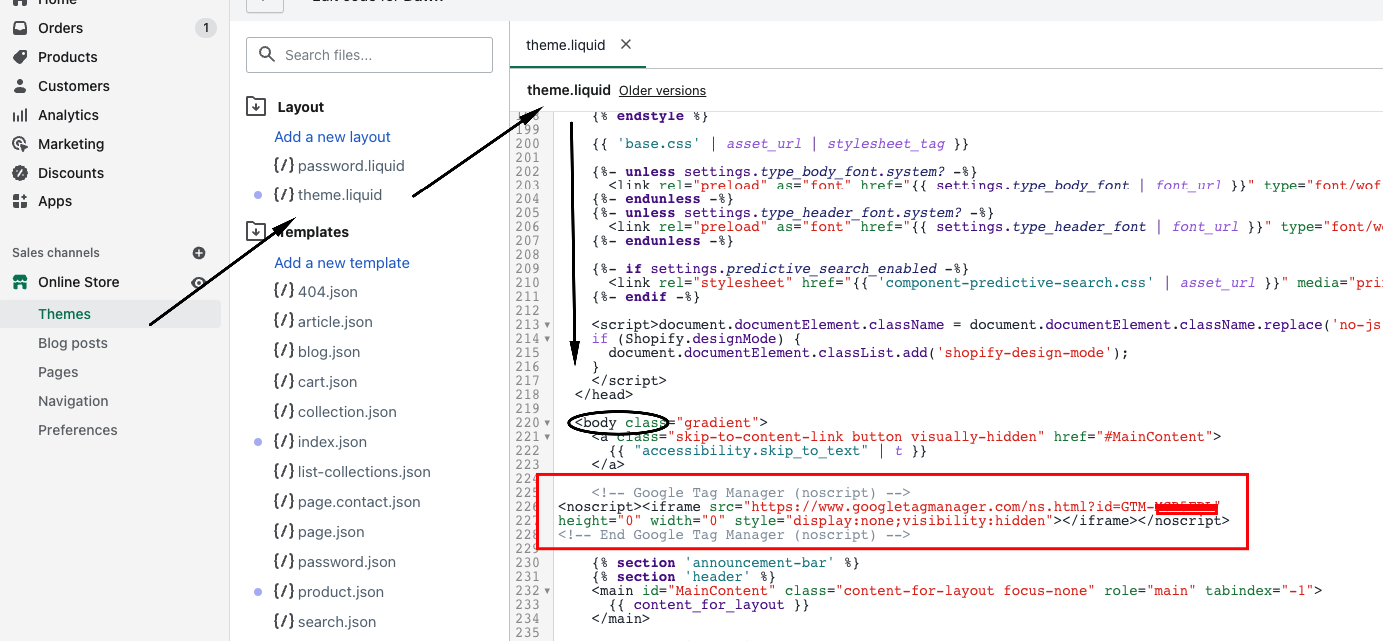
סימנתי בעיגול שחור את מיקום התג <body> ובריבוע אדום את הקוד של חלק 2
זהו הטמעת את התג מנג׳ר
עכשיו נשאר רק ללחוץ על save ולעשות עוד טיפה עבודה 🙂
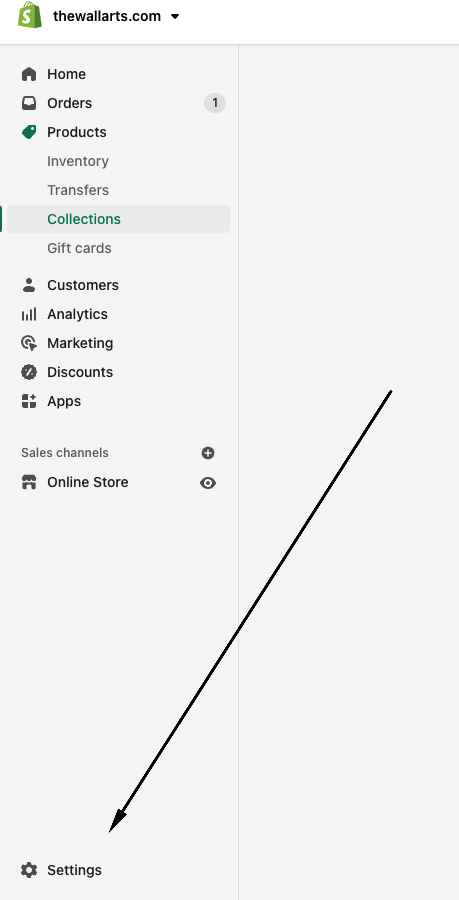
ללכת להגדרות בסוף הדף של מערכת הניהול
להכנס לדף של ה צק אאוט
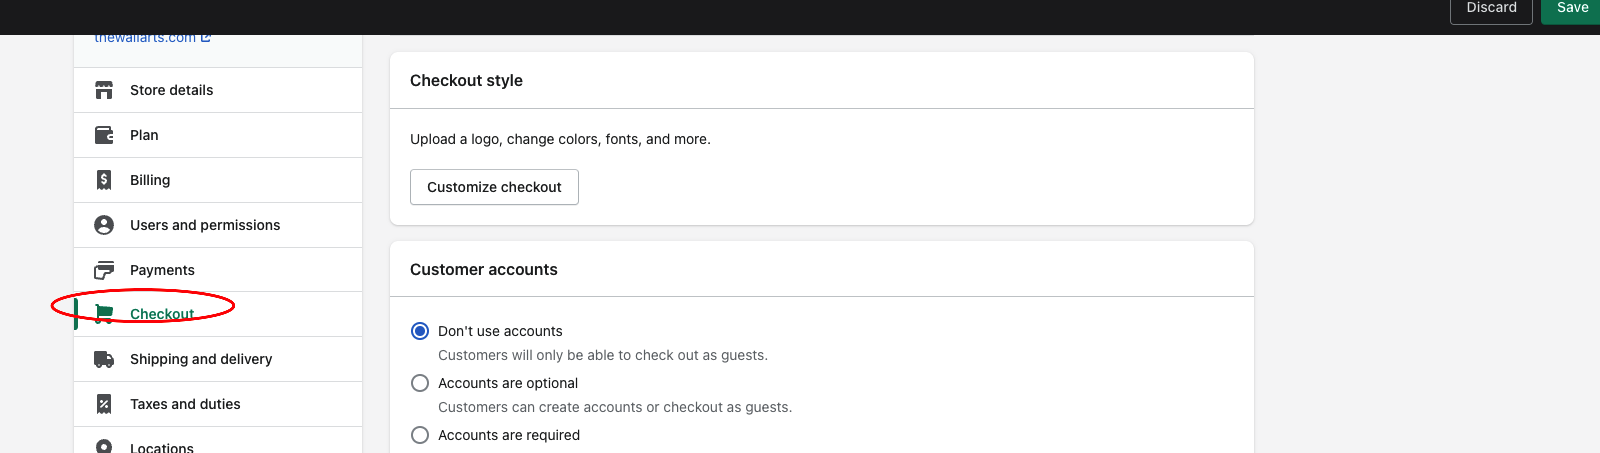
להכניס את הקוד של הקונטיינר של התג מנגר גם לשם כך לא תפספסו את הזרימה כולל הדפים של הרכישה וה Thank you
בנוסף תעתיקו את הקוד הזה של הדטאלייר Data Layer מתחת לקוד של האנליטיק
===================================================================
<!– Data Layer Checkout Purchase –>
<script>
window.dataLayerPYS = window.dataLayerPYS || [];
var shipping_price = ‘{{shipping_price | money_without_currency }}’;
shipping_price = shipping_price.replace(“,”, “.”);
var total_price = ‘{{total_price | money_without_currency }}’;
total_price = total_price.replace(“,”, “.”);
var tax_price = ‘{{tax_price | money_without_currency }}’;
tax_price = tax_price.replace(“,”, “.”);
var orderItemsName = []
var orderItemsPrice = []
var orderItemsQuantity = []
var orderItemsId = []
var totalQuantity = 0;
{% for line_item in line_items %}
orderItemsName.push( ‘{{ line_item.product.title | remove: “‘” | remove: ‘”‘}}’)
orderItemsPrice.push(‘{{ line_item.price | times: 0.01 }}’);
orderItemsQuantity.push(‘{{ line_item.quantity }}’);
orderItemsId.push(‘{{ line_item.product_id }}’);
totalQuantity += {{ line_item.quantity }};
{% endfor %}
{% if first_time_accessed %}
window.dataLayer.push({
‘page_type’: ‘purchase’,
‘event’: ‘analyzify_purchase’,
‘currency’: “{{ shop.currency }}”,
‘totalValue’: total_price,
‘shipping’: shipping_price,
‘tax’: tax_price,
‘payment_type’: ‘{{order.transactions[0].gateway}}’,
‘transaction_id’: “{{order.name}}”,
‘productName’: orderItemsName,
‘productPrice’: orderItemsPrice,
‘productQuantity’: orderItemsQuantity,
‘productId’: orderItemsId,
});
{% endif %}
</script>
======================================================================
עכשיו הכנסנו את המידע שיצא כאשר מישהו יגיע לדף רכישה
אנחנו רוצים גם למשוך מידע מתוך דף מוצר
לכן נייצר סניפט בקוד של שופיפיי לזהות את המידע הזה
ניגש ל קוד של שופיפיי למקום הזה ונלחץ ADD New Snipet
מאוד כדאי לקרא לסניפט בשם הזה כדי למנוע תקלות בקוד
Analyzify-product-datalayer
עכשיו תעתיק את הקוד מתחת אל הסניפט
========================================================
<script type=”text/javascript”>
window.dataLayerPYS = window.dataLayerPYS || [];
window.appStart = function(){
{% assign template_name = template.name %}
window.productPageHandle = function(){
var productName = “{{ product.title | remove: “‘” | remove: ‘”‘ }}”;
var productId = “{{ product.id }}”;
var productPrice = “{{ product.price | money_without_currency }}”;
var productBrand = “{{ product.vendor | remove: “‘” | remove: ‘”‘ }}”;
var productCollection = “{{ product.collections.first.title | remove: “‘” | remove: ‘”‘ }}”
window.dataLayer.push({
event: ‘analyzify_productDetail’,
productName: productName,
productId: productId,
productPrice: productPrice,
productBrand: productBrand,
productCategory: productCollection,
});
};
{% case template_name %}
{% when ‘product’ %}
productPageHandle()
{% endcase %}
}
appStart();
</script>
==================================================================
כך זה נראה
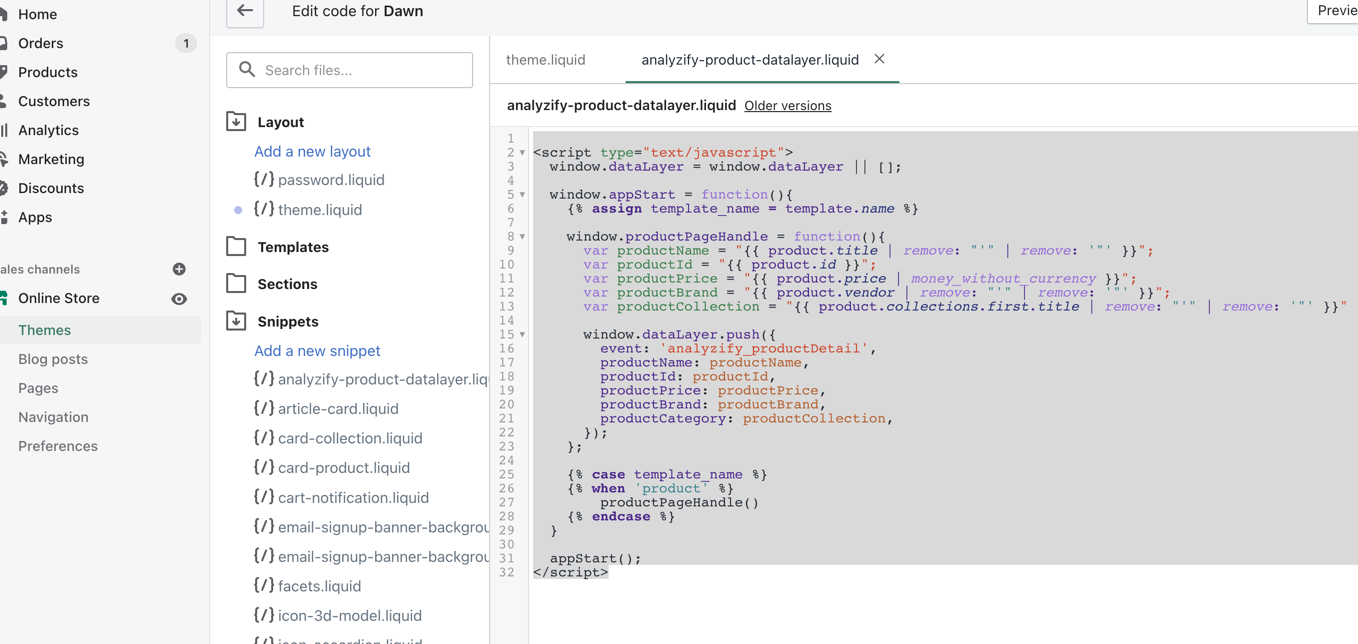
עכשיו צריך לחזור ל theme.liquid ולעדכן שם את הקוד שנמצא מתחת לשורה הזו היכן ש תג <head/>
{% render ‘analyzify-product-datalayer.liquid’ %}
כמו בתמונה

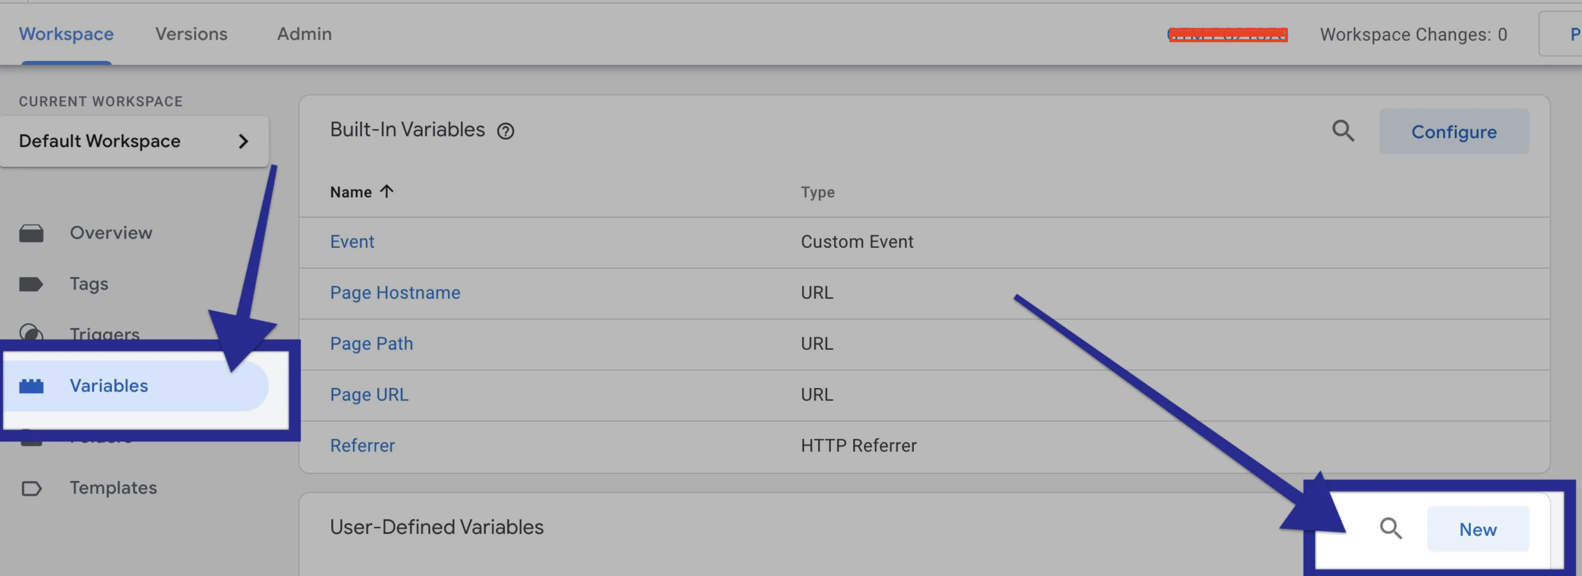
עכשיו נותר רק לייצר אוביקטים בטאגמנג׳ר כדי לקבל את המידע אמין
יש אפשרות לשלוח לי מייל ולקבל את כל המידע בגיסון אחד מסודר או להטמיע לבד בצורה שכזו
- להוסיף את ה variable האלו
- dlv-shipping / shipping
- dlv-tax / tax
- dlv-totalValue / totalValue
- dlv-payment_type / payment_type
- dlv-currency / currency


אם תבקשו ממני את הקובץ אשלח לכם את המידע הזה שתקבלו בצורה אוטומטית
| Name | Type | Function |
| GA4.01 – All Pages | Tag | Google Analytics 4 global configuration tag. It also functions as the “Page View” tag. |
| GA4.02 – Event – View Item | Tag | E-commerce event for product page views. It sends the product-level data into GA4 and allows product-level reports to function. |
| GA4.03 – Event – Purchase | Tag | Core of all e-commerce reports. It sends order-level and product-level data into GA4 and helps with the attribution. |
| cEvent – analyzify_productDetail | Trigger | cEvent refers to Custom Event. This custom triggers works on the product detail pages. |
| cEvent – analyzify_purchase | Trigger | Purchase event trigger works on the order completed (aka. “thank you”) pages. |
| GA4 Measurement ID (G-) | Variable | Your GA4 configuration ID. You need to update this ID once you import the GTM container. |
| dlv-brand | Variable | Data layer variable for the product brand. |
| dlv-currency | Variable | Currency of the order. |
| dlv-productId | Variable | Product’s ID. |
| dlv-productName | Variable | Product’s name. |
| dlv-productPrice | Variable | Product’s price. |
| dlv-productQuantity | Variable | Product’s quantity. |
| dlv-shipping | Variable | Shipping price value of the order. |
| dlv-tax | Variable | Tax value of the order. |
| dlv-totalValue | Variable | Total value of the order. |
| dlv-transaction_id | Variable | Transaction ID of the order. |
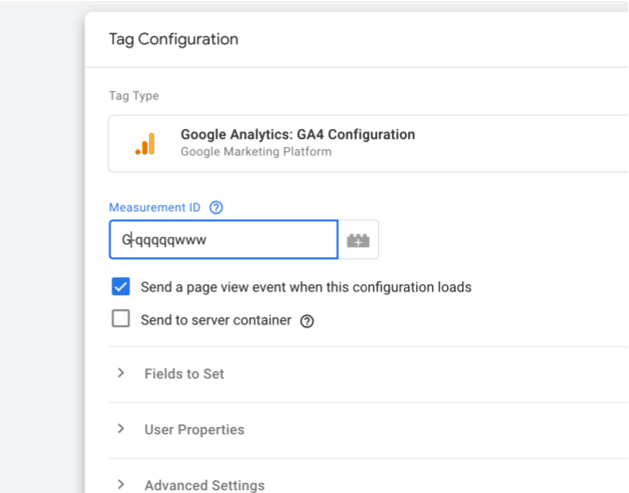
פותחים חשבון באנליטיק 4
או דרך setup asistant של הגרסה הישנה של האנליטיק שלכם מספר 2 בתמונה
או יצירת חשבון חדש של אנליטיק 4 בלבד כמו בחץ 1 בתמונה
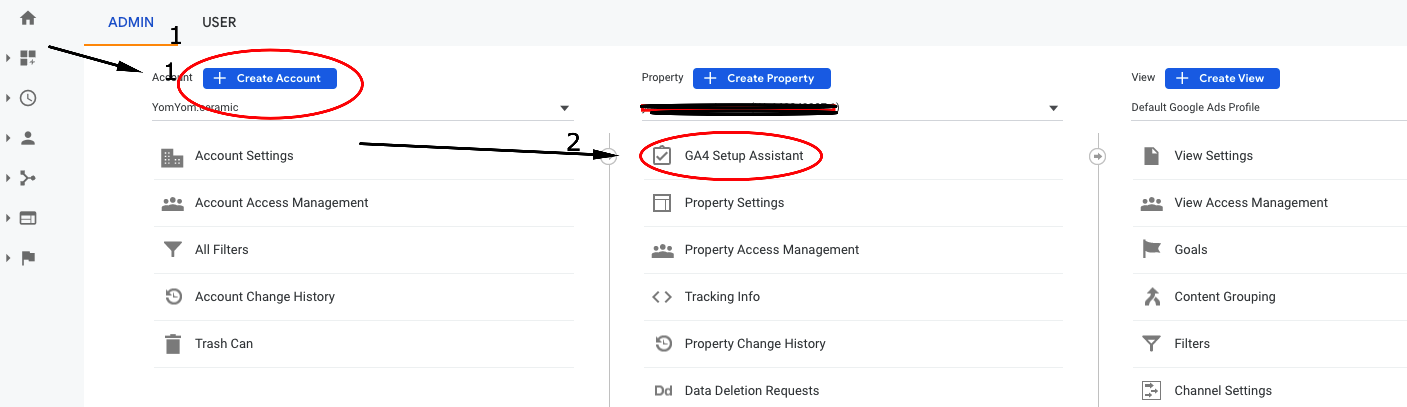
בעקרון אחריי שלוחצים על התחל מה GA4 setup הדברים הם פשוטים ודומים
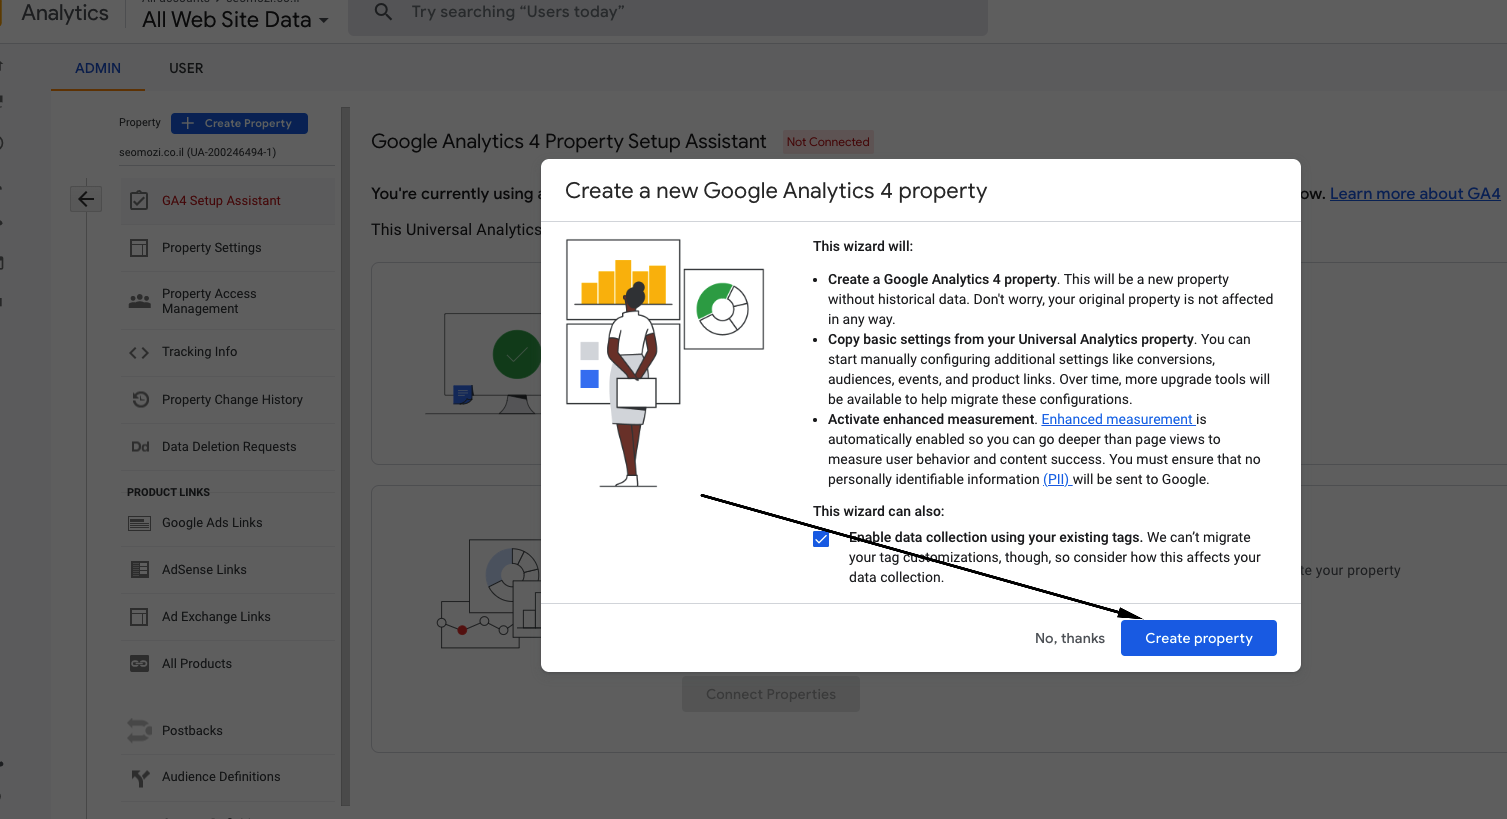
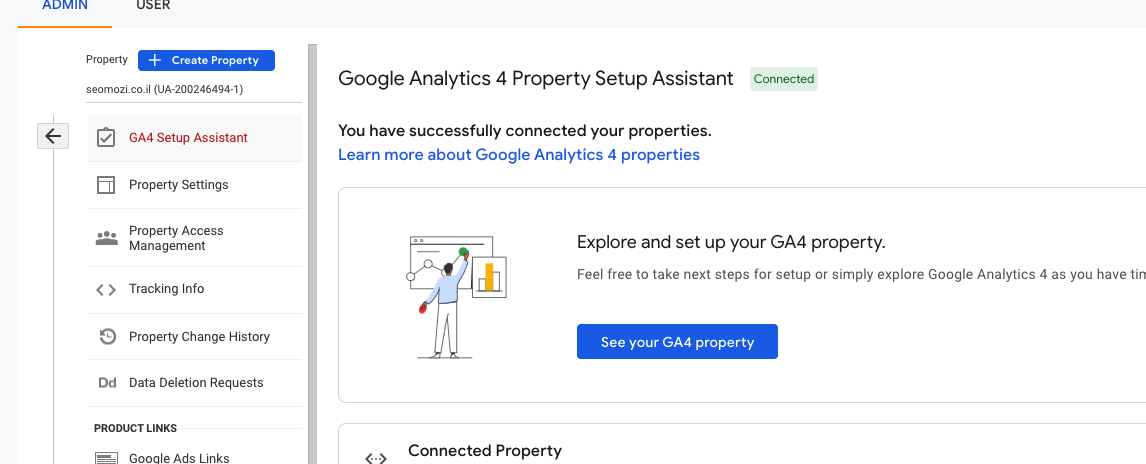
בכל מקרה נכנסים אחרי שנוצר המערכת ל setup asistant ומשם ל tag instalation
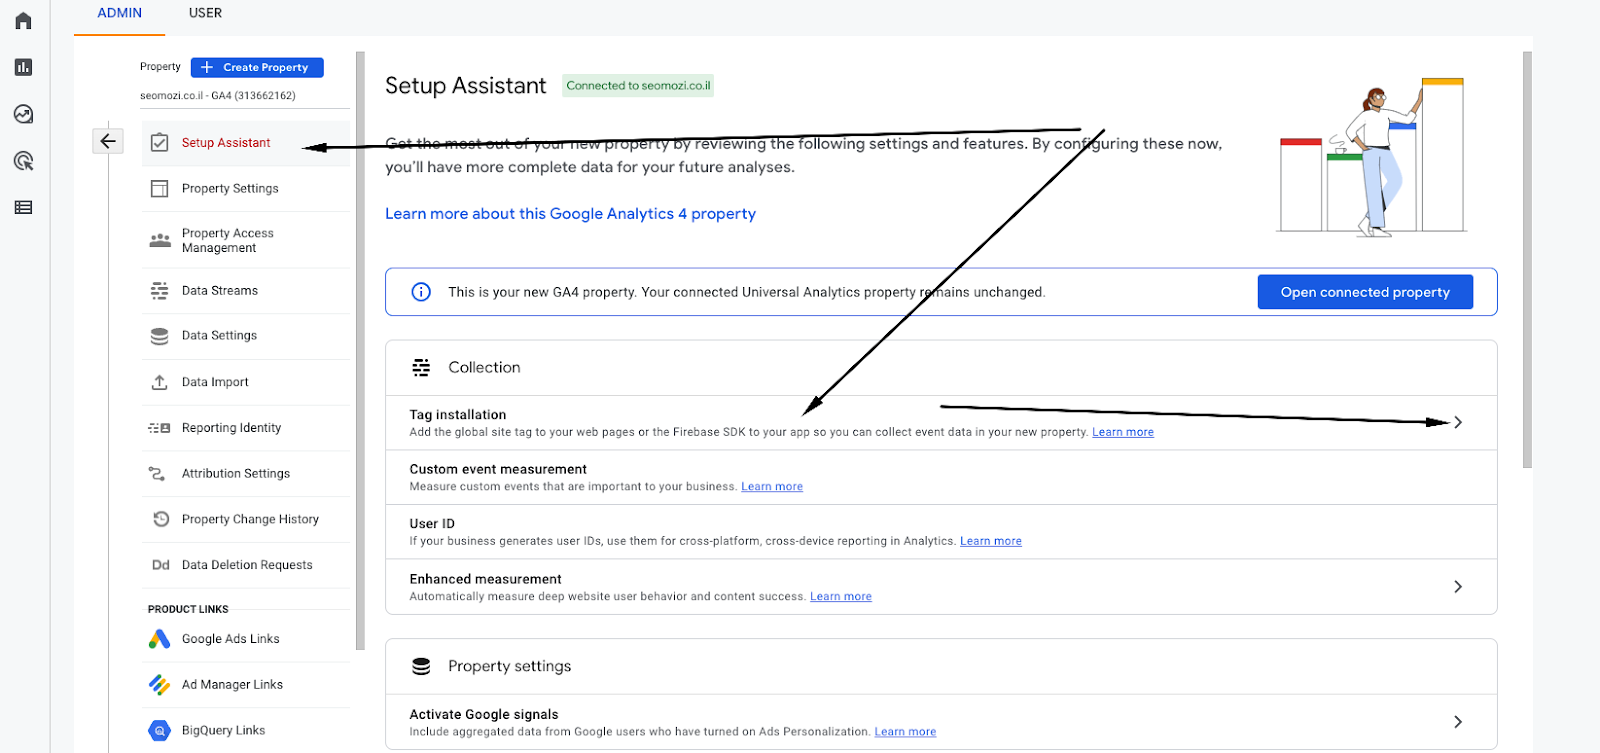
מקבלים את המסך הזה
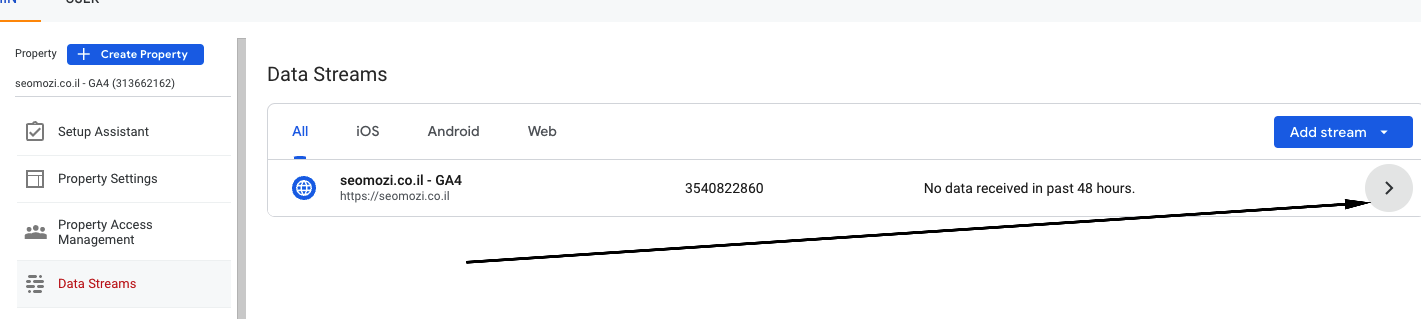
ונכנסים ל דטא סטרים מעתיקים את המספר שיש בצד ימין

ואותו מכניסים בטאג מנגר
כדי לעשות זאת ראשית מתקינים טאג חדש
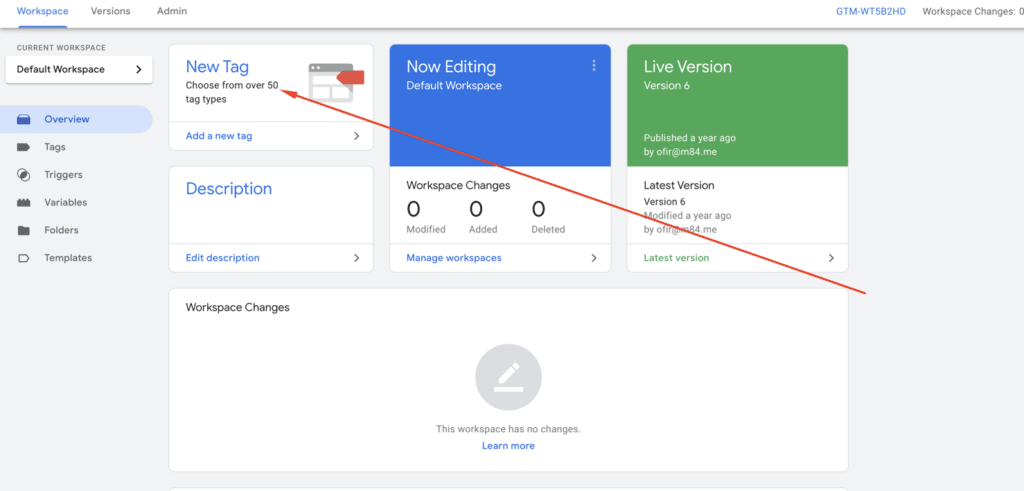
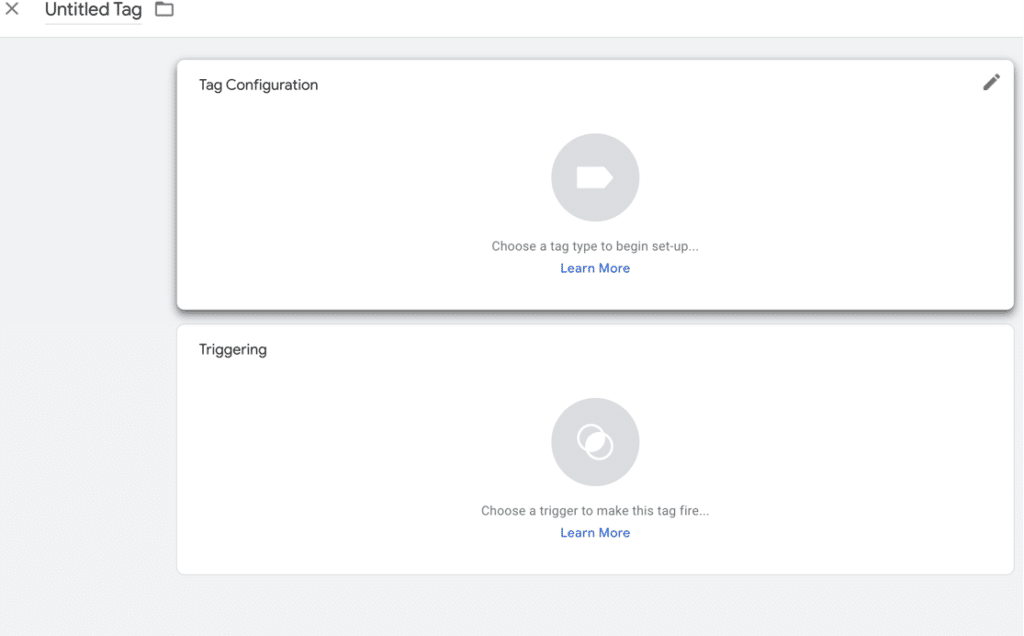
מקבלים את רשימת הטאגים
מאשרים
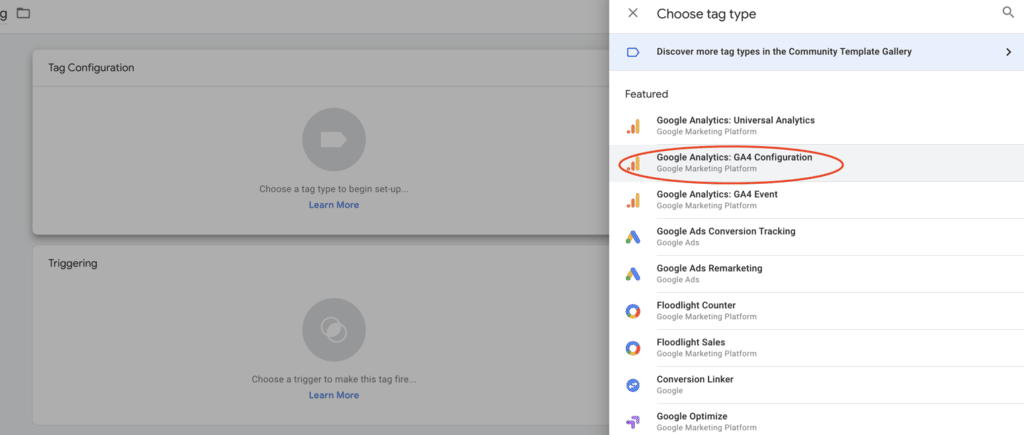
מקבלים את המסך הבא
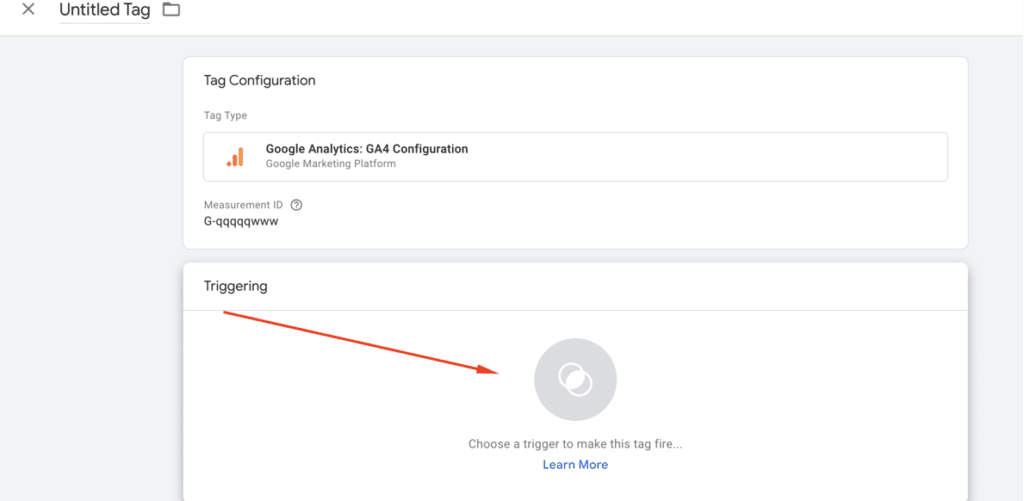
לוחצים במרכז
בוחרים All Page
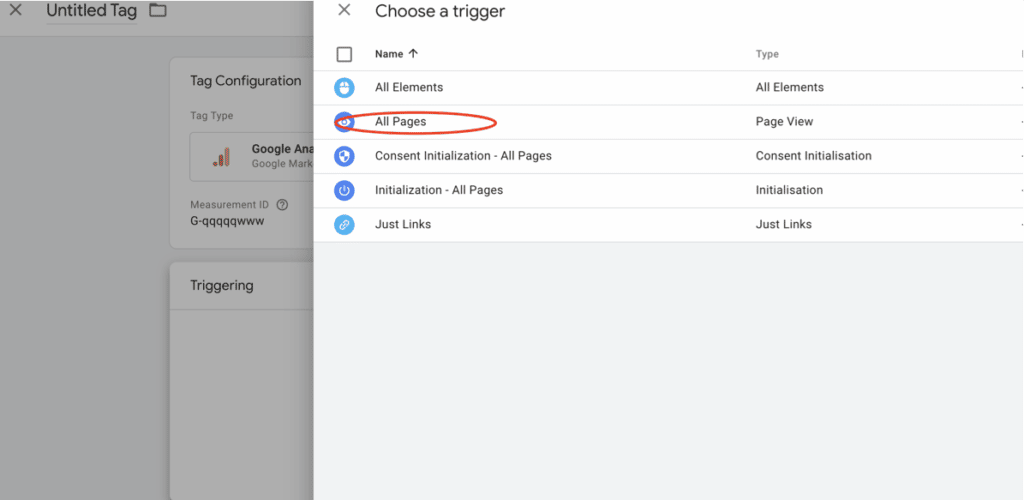
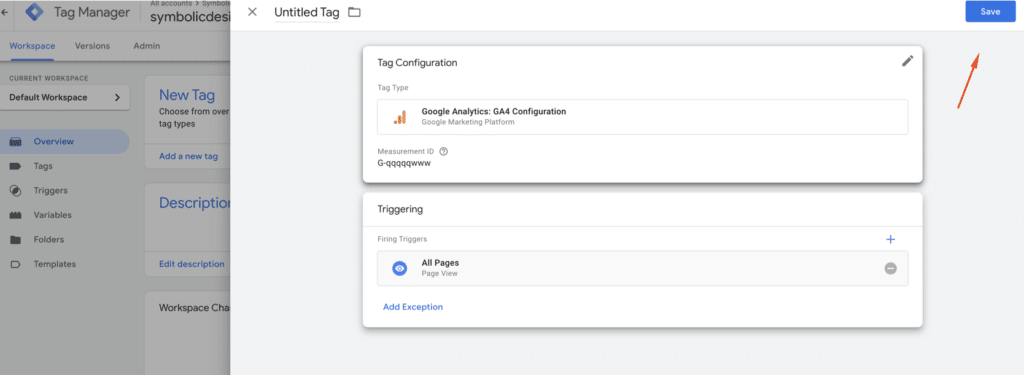
שומרים על השם
ואז לוחצים על submit